Cookery [kook-uh-ree] - the art or practice of cooking; a place equipped for cooking.

Saturday, February 21, 2015

Andes Mint Chocolate Chip Cookies

This one is based off a recipe found on the Andes Creme de Menthe Baking Chips bag. I didn't follow it exactly, since I wanted to make a larger batch for a party but didn't have a second bag of those particular baking chips. So I modified the recipe a bit, but they still turned out delicious! Too bad I typically only see those Andes baking chips around during the Christmas holidays....but maybe that's a good thing, or else I'd be making way more cookies than I should...


Servings: 68
About 121 calories per serving

Note: This make a very large batch. It can definitely be halved or quartered for smaller batches.

Ingredients:
1 cup unsalted butter, softened
1 1/2 cup brown sugar
1 cup white granulated sugar
2 tsp baking soda
2 tsp baking powder
1 tsp salt
4 eggs
4 tsp vanilla extract
1 pkg Andes Creme de Menthe Baking chips (10 oz)
1 cup (6 oz) Nestle Semi-Sweet Baking chips
4 1/2 cup all-purpose flour

Step 1: Preheat oven to 350F.
Step 2: Beat butter, brown sugar, white sugar, vanilla, and eggs until mixed.
Step 3: Mix in baking soda, baking powder, and salt (mix well).
Step 4: Mix in flour (mix well).
Step 5: Add Andes and Semi-sweet baking chips, stir.
Step 6: On lined or non-stick baking pan, drop heaping tbsp of dough.
Step 7: Bake for 14-20 minutes (will depend on whether you are baking more than one pan at a time). If baking two pans at a time and on different racks, rotate pans halfway through cooking time (they will also need a few extra minutes). I did two racks at a time and each batch required 18-19 minutes.
Step 8: Cool (or eat some hot like I did!).

Recipe's time estimate: not listed
My total cooking time: 59 minutes (20 minute prep, 39 minutes cook)

A lot of my prep time was mixing the batter. I don't have a stand mixer, and mixing large amounts of dough by hand takes a while to ensure thorough mixing. So if you make a smaller batch or have a stand mixer, your times will be shorter. These were a hit at our game night party. I think using partially semi-sweet chocolate chips helped keep the cookies from being over-poweringly sweet. I'll make these again, but will try and play with the ingredients to maybe cut down on the calories.

Ingredients

Step 2

Step 5

Step 6

Sunday, February 15, 2015

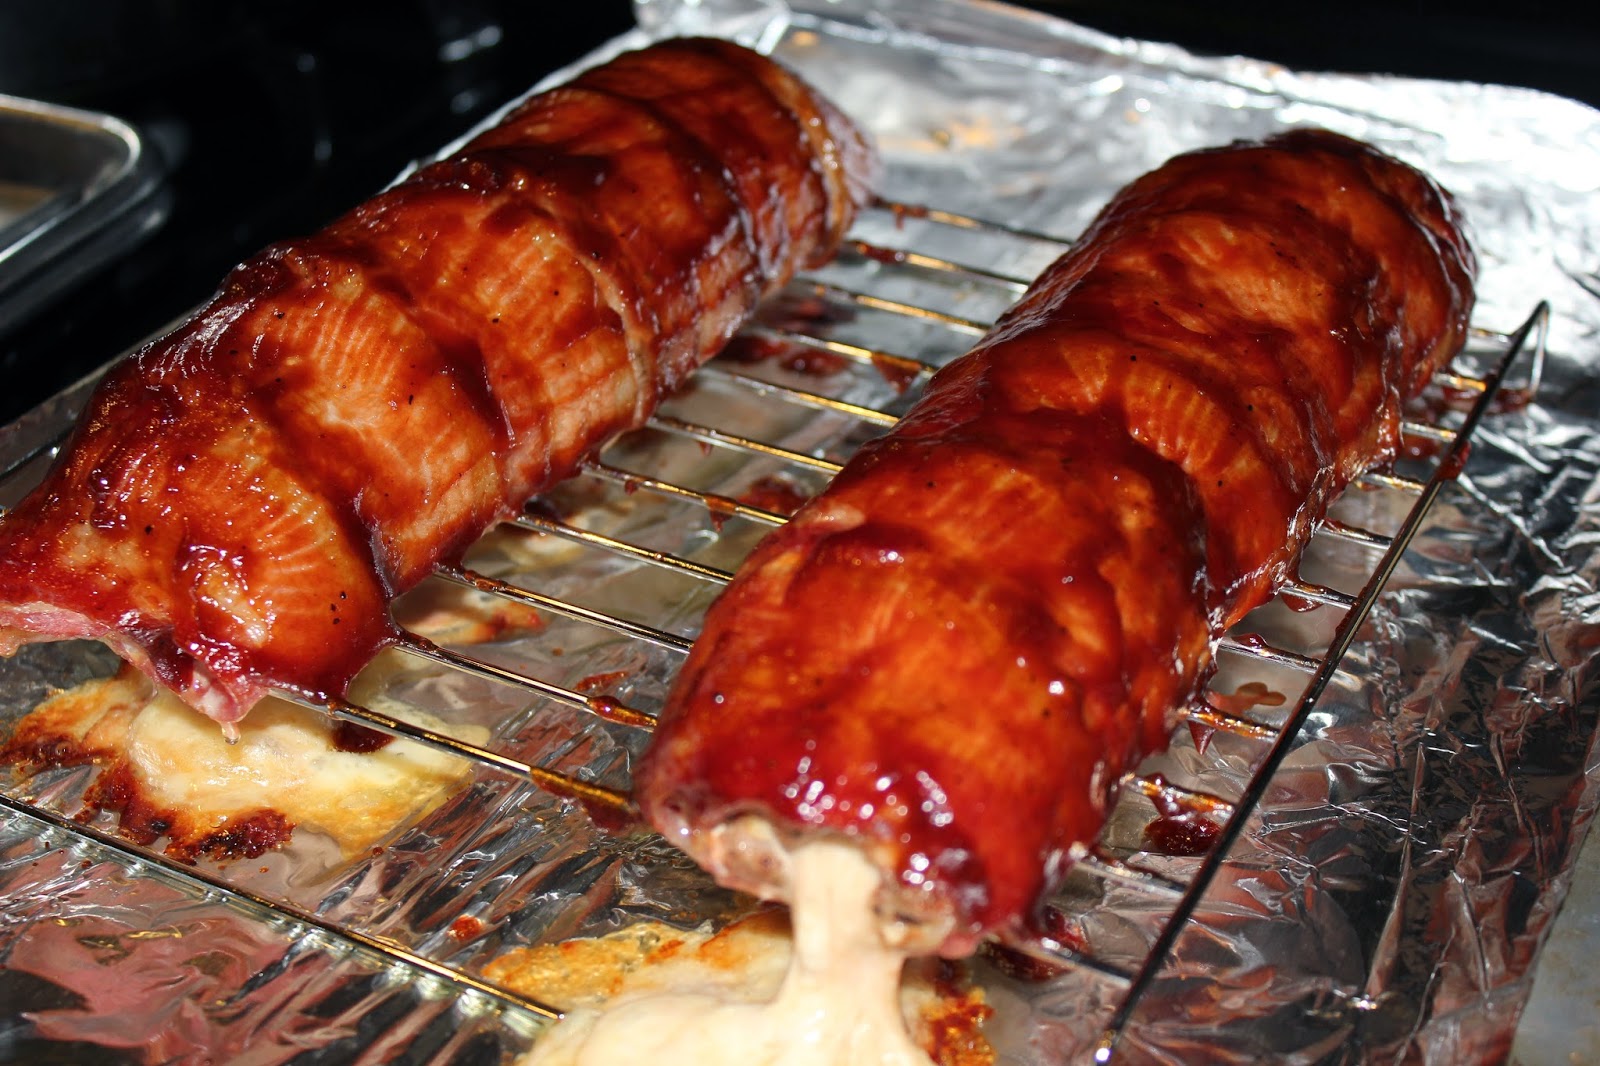
BBQ Bacon Sushi

Yes...the name is a little....odd. And maybe off-putting to some. But I LOVE bacon and was intrigued. I actually found this through some Facebook page, and was excited by how easy the recipe looked. And what better time to try it than Valentine's Day, for my sweetie that loves all things meat? I used ground lean turkey, since that's what I have on-hand, instead of beef like the recipe called for. I also used my oven on "bake" setting, because I didn't feel like using our outdoor BBQ grill. The original recipe (actually a YouTube video) can be found here. This turned out OK, and it was actually really easy to make. I think I just need to fine-tune the ground meat seasoning, as it was a little bland this first attempt.


Servings: 16
About 141 calories per serving

Ingredients:
12 Slices of Bacon
1.5 lbs Ground Turkey (24 oz)
BBQ Rub or seasoning of your choice
4-5 oz cheese
2/3 cup BBQ sauce

Step 1: Preheat oven to 375 degrees.
Step 2: Prep grilling rack (I used a small grill rack in a lined baking tray).
Step 3: Prep ground meat, mixing with desired seasoning.
Step 4: On wax paper, lay out 6 slices of bacon side-by-side.
Step 5: Spread half of the ground meet on top of the bacon in a thin layer.
Step 6: Put half of the cheese (cut into sticks or strips) along one side of the meat (at one of the edges with the bacon ends).
Step 7: Roll everything up, like sushi.
Step 8: Place roll on grill rack.
Step 9: Repeat steps 4-9 with remaining bacon, meat, and cheese.
Step 10: Bake for 25-30 minutes.
Step 11: Brush with BBQ sauce. Bake for another 10-15 minutes.
Step 12: Brush again with BBQ sauce. Bake for another 5 minutes.
Step 13: Remove from oven. Slice each roll into 8 pieces.
Step 14: Serve with additional BBQ sauce and any other condiments (such as pickled jalapeno).

Recipe's time estimate: not listed
My total cooking time: 55 minutes (15 minute prep, 40 minutes cook)

It's hard to tell if the inside of the roll is fully cooked. The cheese was melted and oozing out, so I assumed everything was done. But when I actually sliced everything and started to eat it, I kind of felt like it could have been cooked longer. Nothing looked raw anymore, but I'm not sure about fully cooked....So in the future I'll add on another 5 minutes to the first two cooking stages. I might also invest in a meat thermometer.

But it was still enjoyable. I might try using sliced cheese and creating another "layer" (more like a pinwheel dish), instead of just a center cheese filling. I might also try layering some BBQ sauce too. I think I'll definitely try this again.

Ingredients

Step 3

Step 4

Step 5

Step 6

Step 7

Step 8

Step 11

Step 13

Wednesday, February 11, 2015

Cherry Pie Bites

Let me start this off by saying....THIS IS ONE OF THE BESTEST, EASIEST DESSERTS EVER!! I made this for Tuesday night Magic night (yes, I am a dork). And there were none left by the end of the night. I was supposed to bring treats to work the next day....oops! :) But since they're super easy to make, I can always make more once I run to the store and pick up more pie filling and crescent roll dough. I found the recipe through Pinterest, actual site is here.


Servings: 16
About 151 calories per serving

Ingredients:
1 can Cherry Pie Filling (21 oz)
2 tubes crescent roll
3/4 cup powdered sugar
2 tbsp milk**

*I used Reduced Fat, which has 8 rolls in each tube
**I used my sweet cream creamer since I didn't have milk...still turned out scrumptious!

Step 1: Preheat oven to 375 degrees.
Step 2: Spray muffin tin with nonstick spray (make sure you spread the nonstick in around the tin's cups, I used a napkin). I needed two muffin tins.
Step 3: Put individual crescent rolls into each muffin tin, putting the widest part in the cup.
Step 4: Scoop pie filling into each roll in the tins. Use up filling as evenly as possibly between all rolls.
Step 5: Fold in the dough of each mini pie, starting with the shortest sides (gaps are fine, take a look at the picture below).
Step 6: Bake 13-15 minutes. Rolls will be golden brown on top.
Step 7: Remove from oven; option to put on cooling rack lined with wax paper.
Step 8: Prep icing/glaze - Mix sugar and milk in bowl until smooth. Add small bits of milk if too thick or small bits of sugar if too thin, until desired consistency.
Step 9: Drizzle icing over bites.
Step 10: EAT

Recipe's time estimate: not listed
My total cooking time: 24 minutes (10 minute prep, 14 minutes cook)

My prep time was probably slightly longer than it should have been, since I was taking pictures. I think I can cut it down to closer 5 minutes. Can also prep the icing right at the end of the oven time, instead of after bites are removed. I ate some fresh out of the oven after icing was applied. OMG, was it good. Will definitely be trying this with different pie fillings.

Ingredients

Step 3

Step 4

Step 5

Step 7