Cookery [kook-uh-ree] - the art or practice of cooking; a place equipped for cooking.

Sunday, August 8, 2010

Lemon-Honey Cupcakes

First off, a technical note:
I'll be changing the layout of my recipes from now on. To make things easier on those that wish to try out the recipe, I won't be including the step-by-step pictures in the middle of the recipe. Instead, for those of you who find them helpful, I'll have them at the end of the recipe. That way it is easy to copy-paste/print the recipe, but you still get the picture references. :)

Now, for dinner, I made the delicious Beef and Nectarine Stir-fry, but wanted something new for dessert! I settled on Lemon-Honey cupcakes (so there are smaller, easily defined serving sizes) from the Women's Day website: you can find the original recipe here.

                                                            ~Lemon-Honey Cupcakes~


Ingredients:
~Cupcake~
2 3/4 cups all-purpose flour
3/4 tsp baking powder
3/4 tsp baking soda
1/2 tsp salt
1/2 cup reduced-fat sour cream
1/4 cup milk
1 1/2 tbsp grated lemon zest
4 tbsp lemon juice
3/4 cup unsalted butter, softened
3/4 cup honey
1/4 cup sugar
3 large eggs
~Frosting~
1 cup unsalted butter, softened
1/4 cup honey
1 1/2 tbsp grated lemon zest
4 cups confectioner's sugar
7-8 tsp lemon juice
Few drops of yellow food coloring

(Makes ~24 cupcakes)


Step 1:  Preheat oven to 350F. Line muffin pan with paper cups.
Step 2: Whisk flour, baking powder, baking soda, and salt in a medium bowl to blend.
Step 3: Whisk sour cream, milk, lemon zest, and lemon juice in a small bowl until well mixed. 
Step 4:  Beat butter, honey, and sugar in large bowl with an electric mixer for 2 minutes [or in my case, my handy-dandy stainless steel whisk] until light and fluffy. Beat in eggs, one at a time, until blended. 
Step 5: With mixer on low speed [or whisking by hand], add and beat in half the flour mixture to the butter-honey-sugar mix, then the whole sour cream mixture. Beat in remaining flour mixture until just combined. 
Step 6: Spoon about 1/4 cup batter into each muffin cup [I did a little less than 2 scoops with my PC medium scoop]. Bake 18 to 20 minutes until wooden pick inserted in center comes out clean. Cool 10 minutes; remove cupcakes from pan to wire rack to cool completely. 


Frosting:  ***
Step 1:  Beat butter, honey, and lemon zest in large bowl with an electric mixer [or by hand!] until creamed, about 2 minutes.
Step 2: Beat in confectioners’ sugar until blended.
Step 3: Beat in lemon juice and a few drops food color until mixture is fluffy and pale yellow. 
Step 4: Spoon into a large ziptop freezer bag, snip off one corner and pipe onto cupcakes, or just spread frosting onto cupcakes.


***I personally found the frosting recipe led to a rather liquidy, unfrosting-like frosting. When you try to pipe it onto the cupcakes, it just runs down the side and makes a mess. =/ Letting the frosting mixture sit for 10-20 minutes helps a little, but not much. I recommend spreading a thin layer onto the cupcakes. If you desire more frosting, you can spread a second layer once the first layer is set.


Total cooking time: 1 hour 15 minutes
(including oven-baking and cooling time)


Overall, this recipe tastes very good. I just need to find a way to make the frosting more solid so I can pipe it on. There really is too much made with the frosting recipe to just be for spreading (I tossed about half of it down the drain....so sad...).


Ingredients
Step 3
Step 5 & 6
Frosting

Tuesday, August 3, 2010

Creamy Broccoli & Sun-dried Tomato Orzotto

Pampered Chef sent out a little consultant kit that included their newest Season's Best recipe book, Fall/Winter 2010. I had to try one of the recipes in it!! Before seeing this recipe, I'd never even heard of orzo pasta (who knew there was a past that looked like rice?). And I've never used sun-dried tomatoes in a recipe before (I don't count when I made a deluxe burger with my brother, since he dealt with the tomatoes). AND I've never used/heard of mascarpone cheese. So this was definitely an adventure! And for ~$2 per serving (this recipe serves 8), this was a good deal, because it means I'll get leftovers for lunch this week!!

Ingredients:
1 medium onion
3 garlic cloves, pressed
2 tsp olive oil
1 1/2 cups uncooked orzo pasta
3 1/4 cups chicken broth
3/4 cup dry white wine (ie: Chardonnay)
1 jar (8 oz) sun-dried tomatoes in oil, drained and patted dry
1 head broccoli (about 2 cups florets)
2 oz Parmesan cheese, shredded
6 oz mascarpone cheese
Chopped fresh parsley (optional)


Step 1:
Finely chop onions (I used the PC Food Chopper). Combine onion, pressed garlic, and olive oil in Deep Cover Baker (PC). Microwave (covered) on High 2 minutes.


Step 2:
Stir in orzo, broth, and wine. Microwave (covered) on High 14-16 minutes or until orzo is tender.

Step 3:
Meanwhile, thinly slice tomatoes, set aside. Cut broccoli into small florets. Grate Parmesan cheese (if bought ungrated/unshredded).


Step 4:
Remove baker from microwave. Stir in tomatoes and broccoli. Cover; let stand 5 minutes.


Step 5:
Add cheese to baker; mix well. Let stand, covered 2-3 minutes or until almost all of the liquid is absorbed. Garnish with chopped parsley, if desired (I didn't).


**Optional Step 6:
I decided that the recipe needed to have some MEAT in it! So I took a can of chicken (the one that's like a can of tuna), drained it, and mixed in it after Step 5 above.


Total time: 45 minutes
(including prep and cooking times)

And I must say, this is one of the bestest, easiest dishes I have ever made. It is a medley of YUM!!!! I highly recommend this recipe. If you don't like chicken, it's definitely good without, or you could try tuna (not sure how that would go). The main reason I added chicken is to make it an all-in-one dish, so I didn't need any sides or extras. If you try this with another sort of meat, let me know! I'd love to hear about variations!

Saturday, July 31, 2010

Red Velvet Cupcakes

I love baking. It's my passion. Cooking is fine and all, but I love the sweet, decadent, sinful desserts...which is why my co-workers complain that they only started gaining weight after I was hired. Because most recipes have more than 2 servings, I take the extras to work!! :) So they both love and hate me. Tonight I made Red Velvet Cupcakes from a recipe I found at AllRecipes.com.

This recipe make 30 cupcakes. o_O I definitely didn't need that many, so I halved everything the recipe called for. I am posting the recipe as I found it, so what you see below makes 30 cupcakes (or 60 minis).

Ingredients:
~Cupcakes~
2 1/2 cups flour
1/2 cup unsweetened cocoa powder
1 tsp baking soad
1/2 tsp salt
1 cup butter, softened
2 cups sugar
4 eggs
1 cup sour cream
1/2 cup milk
1 (1 oz) bottle red food color [I used 1/2 of a Safeway 0.25 oz bottle]
2 tsp vanilla extract
~Vanilla Cream Cheese Frosting~
1 (8 oz) package cream cheese, softened
1/4 cup butter, softened
2 tbsp sour cream
2 tsp vanilla extract
1 (16 oz) box confectioners' (powdered) sugar


Step 1:
Preheat over to 350F. Mix flour, cocoa powder, baking soda, and salt. Set aside.


Step 2:
Beat butter and sugar in large bowl with electric mixer on medium speed for 5 minutes or until light and fluffy (I do not have an electric mixer, so I used my stainless steel whisk). Beat in eggs, one at a time. Mix in sour cream, milk, food color, and vanilla.


Step 3:
Gradually beat in flour mixture on low speed (or by hand) until just blended. DO NOT OVERBEAT!


Step 4:
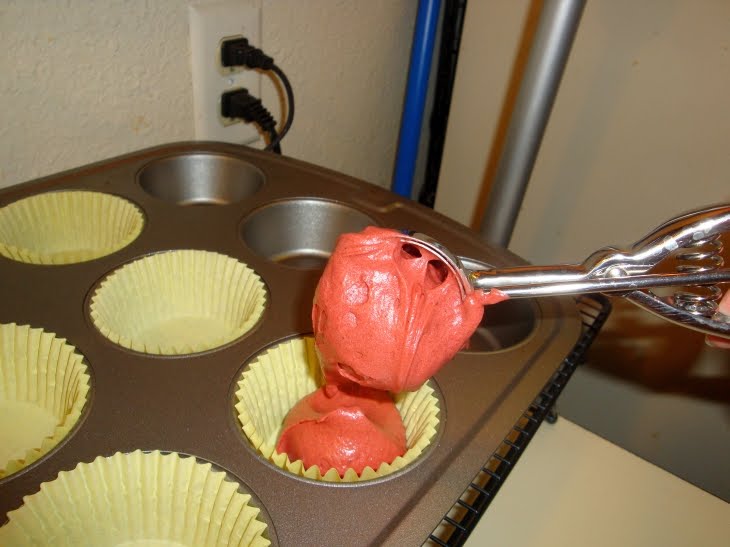
Spoon batter into 30 paper-line muffin cups, filling each cup 2/3 full.


Step 5:
Bake 20-25 minutes or until toothpick inserted into cupcake comes out clean. Cook in pans on wire rack 5 minutes. Remove from pans; cool completely.


Step 6:
The Vanilla Cream Cheese Frosting.
Beat cream cheese, softened butter, sour cream, and vanilla extract in large bowl until light and fluffy. Gradually beat in confectioners' sugar until smooth.


Step 7:
FROST THE CUPCAKES!!!


Estimated prep time: 20 minutes
Estimated cook time: 25 minutes

My actual total cook time: 52 minutes

My first time making these, and I was only 7 minutes over the estimated timing. Not bad! And...these turned out just like they look....DELISHUS!!! Nom nom nom!!!

Garlic & Herb Beef Tenderloin

What to cook tonight.... Mexican? No. Some form of Italian? Nah. Salad? Hell no! *light bulb* I know!! STEAK!! Juicy, flavorful, wonderful, made-for-carnivores steak!! And I know just the recipe! From The Pampered Chef's 29 Minutes to Dinner: Volume 2, I'm gonna make Garlic and Herb Beef Tenderloin. This will be the second time I've made it (the first time was utterly delicious!). Let's see if I can replicate it.

Ingredients:
~Beef~
1 tsp vegetable oil
4 beef tenderloin filets (4-6 oz each; 1 inch thick)  [I used 2 filets, totally ~1.2 lbs, since Safeway doesn't sell 4 packs...]
1 tbsp Crushed Peppercorn & Garlic Rub (PC)
~Sauce~
1 shallot, finely chopped (or 1/2 an onion, which is what I used the first time, but I used a shallot this time)
1/4 cup dry white wine (ie: Chardonnay)
1 pkg (5.2 oz) garlic and herb-flavored cheese spread [I used The Laughing Cow's Light Garlic and Herb spread - it comes with 8 wedges, and I used 7]
1/3 cup chicken broth

**Can be served with plain mashed potatoes mixed with a reserved portion of the above sauce**


Step 1:
Add oil to skillet, heat over med-high heat 1-3 minutes or until shimmering. Season filets with rub (see above). Cook filets undisturbed 3-5 minutes or until browned. Turn filets over; cook 3-5 minutes. If you have a meat thermometer, cook until it register 140F or 60C for medium-rare. Remove skillet from heat, transfer filets to plate. Tent plate with foil and let stand 5 minutes.


Step 2:
Return skillet to heat and cook shallot 30-45 seconds or until softened; add wine.


Step 3:
Use silicone whisk (or some non-scratch utensil) to loosen browned bits from bottom of skillet. Add cheese spread. Cook and stir 20-30 seconds or until cheese spread is melted and smooth.


Step 4:
Add broth and cook an additional 30-45 seconds or until heated through.


Step 5:
Reserve 1/2 cup of sauce for mashed potatoes (if you're serving some with the steak). Serve filets with remaining sauce.


Proclaimed cook time: 24 minutes

Total cook time: 39 minutes (this includes prep time)

Not too shabby. A delicious dish in under 45 minutes!! And it serves 4 people (if you find 4 filets...or I guess you could cut the 2 in half). I served the steak with instant mashed potatoes mixed with the reserved sauce.

Thursday, July 29, 2010

Lively Lemon Bars

Tonight, we ate out (Chinese food, yum!) and I made dessert!! I felt like something fruit, so I decided on lemon bars (which I actually meant to make last night, but I took a 2 hour nap instead). From The Pampered Chef's It's good for you cookbook.

Ingredients:
~Crust~
1 1/2 cups all-purpose flour
1/2 cup powdered sugar
1/2 cup 70% vegetable oil spread  [I used 1/2 c. sweet cream butter since that's all I had in the fridge)
~Filling~
3 lemons (I used dried lemon peel and lemon juice instead of actual lemons)
1 cup granulated sugar
2 eggs
2 egg whites
2 tbsp all-purpose flour
1/4 teaspoon salt
2 tsp powdered sugar (for topping)

Recipe time estimate:
Prep time: 15 minutes
Cook time: 37 minutes

Step 1:
Preheat oven to 350F. Spray Square Baker (PC) [I used a glass square baking pan] with nonstick cooking spray.

Step 2:
CRUST. Combine flour and powdered sugar. Add vegetable oil spread (I added the sweet cream butter, softened); blend using a pastry blender (I used a fork) until misture resembles coarse crumbs.


Step 3:
Press crumb mixture onto bottom of baking pan. Bake 17 minutes; remove from oven to Stackable Cooling Rack (PC).


Step 4:
While crust is cooling, zest two lemons to meason 2 teaspoons zest. Finely snip zest using Kitchen Shears (PC). This is where I just measured out 2 tsp of dried lemon peel.

Step 5:
Juice lemons to measure 1/2 cup of juice. This is where I used store bought lemon juice.

Step 6:
Combine lemon zest, juice, and granulated sugar; whisk. Add eggs, egg whites, flour, and salt; whisk until blended.

Step 7:
Pour filling over crust, spreading evenly. Bake 20 minutes or until filling is set (I baked for an extra 10 minutes to set the filling; probably took longer due to different pan than recipe called for). Remove from oven to cooling rack. Cool completely.


Step 8:
Sprinkle with powdered sugar. Cut into bars.


My actual cooking time:
Prep time: 16 minutes
Cooking time: 47 minutes
Total time: 63 minutes


Overall, rather tasty. Not the best lemon bars I've ever made, but not bad. I highly recommend using fresh ingredients (ie: lemon), as the bars taste a little more bitter than I think they should.

Doing this verbatum to the recipe would make each bar (16 total) 170 calories.

I'll try it with fresh next time, and may make an addendum to this recipe post. We'll see!

Tuesday, July 27, 2010

Beef and Nectarine Stir-Fry

So the past few months, since I became an independent consultant for The Pampered Chef, pretty much all the recipes I've made have been PC. Tonight, I decided to finally venture out and explore the world again!!! OK, nothing so dramatic. But tonight's recipe I found in The About.com Guide to Shortcut Cooking. Hey, it was on the heavily discounted bookshelf at Borders!

~Beef and Nectarine Stir-fry~

Serves: 4

Ingredients:
1 lb beef bottom round steak
1 tbsp white wine vinegar
1 tbsp soy sauce
1 tbsp cornstarch
2 tbsp peanut oil
1 onion, chopped
4 nectarines, sliced
1 cup stir-fry sauce (I found it at Safeway)

Step 1:
Place beef in the freezer for 15 minutes (makes it easier to slice). Slice partially frozen beef across the grain.
I admit, I cheated. I bought Safeway's "Ranchers Reserve Beef Top Sirloin Strips for Stir Fry" (pre-cut). Hey, it save me 15 minutes of freezer time and however many minutes of cutting time. But you can do it the hard way if you like. :)


Step 2:
Place meat in medium bowl; add vinegar, soy sauce, and corn starch. Toss with your fingers to coat. Let stand 10 minutes.


I took the time while the meat was marinating to slice and dice the nectarines and onions. You may also do this before you even start getting your hands dirty.


Step 3:
Heat wok (large skillet) until hot, then add peanut oil. Stir-fry beef until brown (4-6 minutes); remove beef to plate.

Step 4:
Stir-fry onion in wok (large skillet) until tender (4-5 minutes).

Step 5:
Return beef to skillet (don't remove the onions). Add the nectarines and stir-fry sauce. Cook over medium-high heat until sauce bubbles (~5 minutes).


Step 6:
Serve over rice (my choice), couscous, or noodles.


Total time: 40 minutes

Now, at first, nectarines with meat sounded....weird. But it was very good! And you get a serving or two of fruit in your meat and rice dish. ^^ Win-win!

Sunday, July 25, 2010

Cheesy Chicken Chilaquiles

I was looking for a quick and easy recipe for tonight, so I didn't have to spend too much time in the kitchen on a day off, and opened up my Pampered Chef cookbook 29 Minute to Dinner: Volume 2. In it, I found something that looked absolutely delicious, and had less than 10 ingredients (spices included)!

~Cheesy Chicken Chilaquiles~

Ingredients:
1 1/2 lbs boneless, skinless chicken breasts (can substitute thighs)
1 tbsp Southwestern Seasoning Mix (Pampered Chef) - can substitute taco seasoning mix
1 3/4 cups salsa verde
1 cup chicken broth
3/4 cup chopped fresh cilantro
12 cups tortilla chips (authentic restaurant-style)
2 cups shredded Chihuahua cheese (can substitute mozzarella or monterey jack)
1 cup crumbled queso fresco (can substitute farmer's cheese)
Optional: Sour cream

Listed cooktime: 23 minutes

My ingredients:


I also had a 14 oz bag of tortilla chips that claimed they were "restaurant style" (I used the whole bag).

Step 1:
Cut the chicken into 1-inch pieces. Luckily, my Cutting Board (PC) has measuring units on each long side.


Step 2:
Combine chicken and seasoning mix in Deep Covered Baker (PC); mix well. Spread chicken evenly over bottom of baker. Microwave (covered) on High 4 minutes. Stir to separate chicken. Microwave (covered) another 4 minutes (or until chicken isn't pink). Drain using colander.


Step 3:
Combine salsa and broth. Chop cilantro. Arranged half the chips (broken) over bottom of baker (no need to rinse or wash baker prior).


Top with half the chicken, salsa mixture and cheeses. Sprinkle 1/2 cup of the cilantro on top.


Repeat layers once, ending with cheeses.

Step 4:
Microwave (covered) on High 5-7 minutes, or until cheese are melted. Let stand (covered) 5 minutes. Sprinkle with remaining cilantro. Serve with sour cream (optional).

The finished product:


Looks pretty close to the picture in the cookbook, huh? :) It worked out great! And it was very, very delicious.

Prep time: 20 minutes (including attempting to figure out if the 14oz bag of chips = 12 cups the recipe called for; I gave up)
Cook time: 38 minutes

Total time: 58 minutes
Not bad for a first attempt. I bet after I've made it a few time I could get it down to the proclaimed "23 minutes".